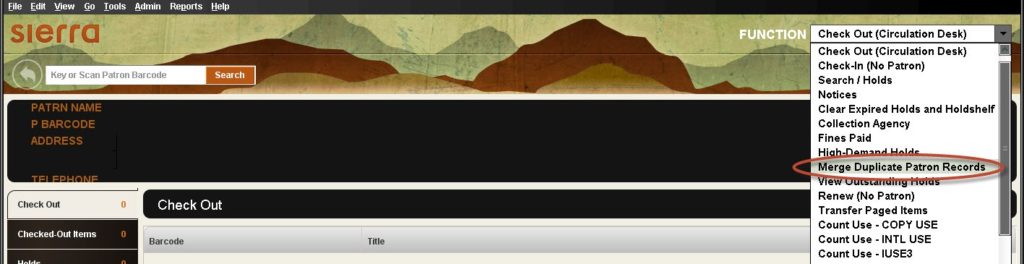
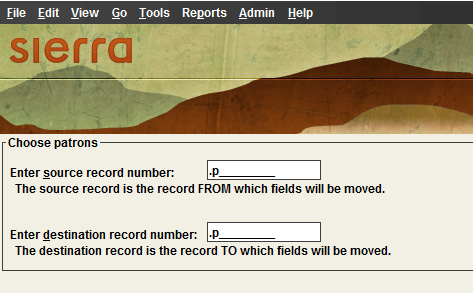
Search Results for: patron records

Ordering Barcodes and Patron Cards
What do you need to know before you order?
-
- What type of barcode do we use?
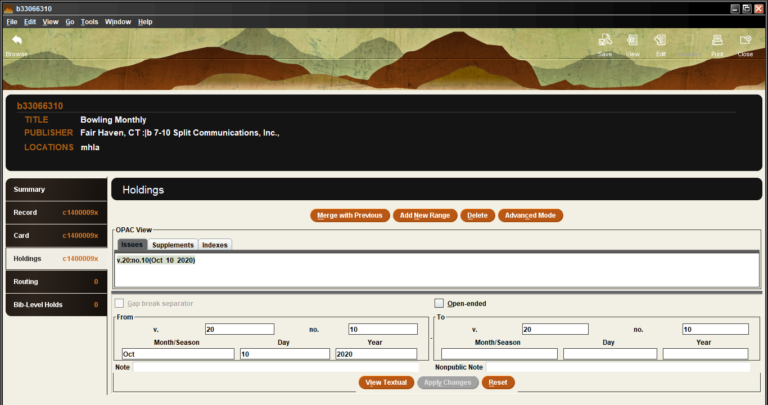
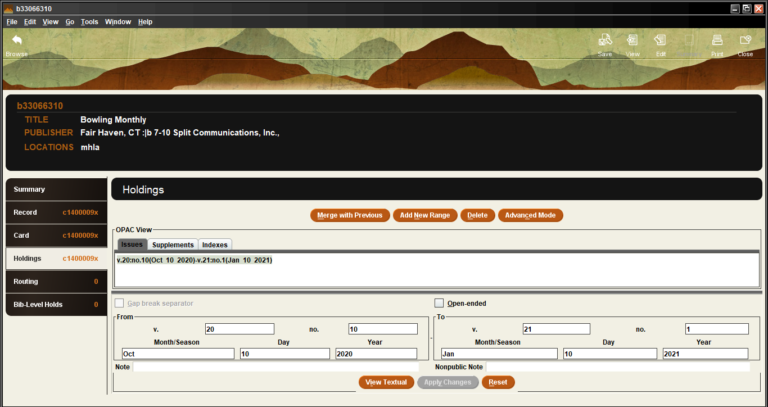
Codabar14 digit barcode, where the last digit is a check digit in a modulus 10 (Mod-10) complementary check digit format (more detail on this format). When you are looking at the barcodes on a sheet, they may not look consecutive to you until you ignore that last number. - What is a check digit?
A check digit is the last digit in our codabar barcode. It is the correct answer to an equation that is done on the previous 13 digits in the code. It’s purpose is to check the validity of the barcode as it is scanned. An incorrect answer would result in an error message, alerting you to rescan. - What your next number should be?
You wont want to repeat any number you have already used. Create a list of all of your current records. Sort the list by the barcode number. Look at the first and last barcode number in your list. The largest of the two numbers is the highest number that has been issued. You will need to also check your current stock to find a higher number. What is the next highest group that you would order.
For example if your highest barcode is 22390000027896, you might consider moving to the next decimal place and order 2239000010000#, where the last digit is the check digit. In this example we just added started the next range by replacing the last 0 with a 1.
- What type of barcode do we use?
Document the order for the next time you need to order.
Barcode Validity Checking: An Example
A typical barcode consists of 14 digits in the following pattern: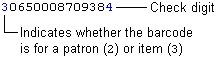
In this example, the barcode uses a modulus 10 (Mod-10) complementary check digit. The check digit derives from the barcode as follows:
Mod-10 Algorithms Differ Among Vendors
The method for calculating a Mod-10 check digit can differ from vendor to vendor. Check with your barcode vendor to determine if their algorithm matches the algorithm used here.
- Starting with the second digit from the left, add every other digit. Using the example barcode above (without the check digit):
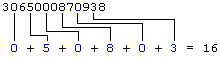
- Multiply each of the remaining digits by 2. If any product has two digits, add the digits to produce a single-digit number. Sum the results:
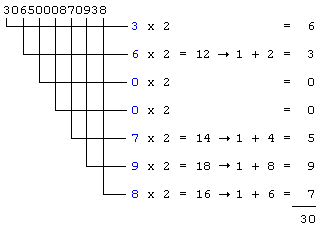
- Add the results from steps 1 and 2. In the example:
16 + 30 = 46 - Subtract the units digit obtained in step 3 from the number 10. The result is the check digit. In the example:
10 – 6 = 4
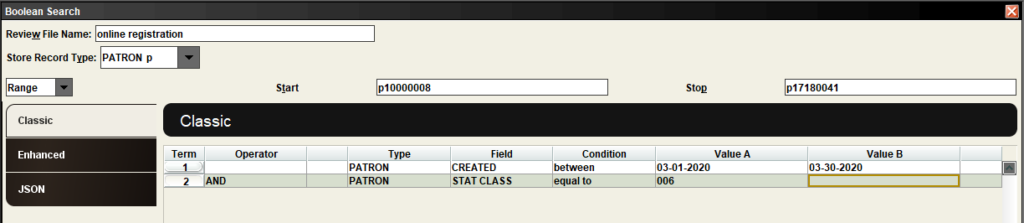
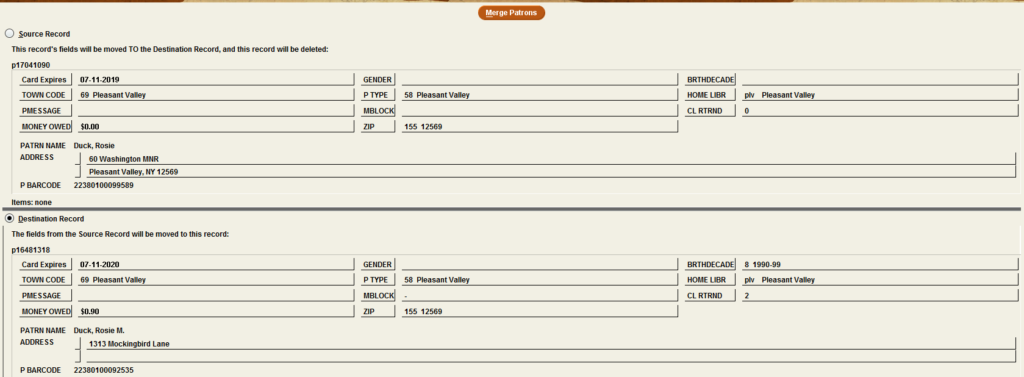
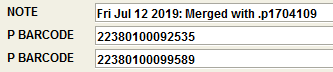
Create List: Import Records
Importing Records from a File
You can create a new review file by importing a list of barcodes, record numbers, or indexed field values. Before creating your list, see Format of Input Files for information on how to format your files.
To import from a file:
- Select Create Lists from the Function list.
- On the Review Files tab, select an empty review file by clicking its row, or select a file to overwrite. To find empty review files, select Empty from the drop-down menu of review file types.
- Click Import Records.
- If prompted to overwrite the existing file, do one of the following:
- Click Yes to open the Import Records dialog box and overwrite the file.
- Click No to return to the list of review files.
- Enter a name for the review file. The maximum length is 150 characters.
- Select how you want to import records into the review file by doing one of the following:
- To import a list of barcodes, select the Barcode radio button.
- To import a list of record numbers, select the Record Number radio button.
- To import a list of index entries, select the Index radio button, and select an index from the drop-down menu.
- From the Store Record Type list, select a record type to store. The list shows only the valid record types for the import method or index you selected in the step above.
- Click Choose File. The Select File dialog box opens.
- Select the text file containing the data you want to import, and click Load. Create Lists processes the file and displays the results in the bottom half of the Import Records dialog box.
Error Messages During Loading
If the file you selected contains entries that cannot be loaded, Create Lists displays an error message. See Error Messages During Loading for more information.
- Click Import to create the review file, or click Cancel to close the dialog box without creating a review file.
Format of Input Files
Input files must be formatted with one value per line. The system searches for exact matches only; partial matching is not supported (for example, entering “12345” in a file will not find a barcode with the value of “123456”).
In addition to the rules above, each input method has additional formatting requirements listed below.
- Barcodes
- When importing a list of item or patron barcodes, keep the following in mind:
- You can import barcodes using either a .txt or .csv file.
- Include the barcode number only; do not include the field group tag.
- Record Numbers
- When importing a list of record numbers, keep the following in mind:
- You can import record numbers using a .txt file only; .csv files are not supported.
- Valid record numbers must begin with the record type tag, such as “b” for bibliographic records.
- Create Lists recognizes record numbers with a character length equal to the smallest record number in the system up to the largest record number in the system.
- The system ignores delimiters and other extraneous text.
- The check digit is not required, but can be included. If your library has mixed-length record numbers, Innovative recommends excluding the check digit, as a 6-digit record number might be confused with a 7-digit record number. In this case, you can import 6-digit and 7-digit numbers separately.
- Indexed Fields
- When importing a list of indexed field values, keep the following in mind:
- You can import record numbers using either a .txt or .csv file for indexed fields.
- Phrase indexes are supported; keyword indexes are not supported.
Error Messages During Loading
When you load a .csv or .txt file, Create Lists processes each entry in the file. If any entries cannot be loaded, Create Lists displays an error message stating there are one or more entries that:
- Don’t match any record
- Match multiple records
- Don’t fit in the review file
For example:
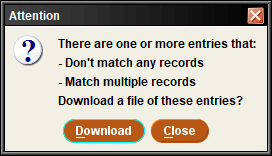
To download the error file:
- Click Download. The system opens the Save file dialog box.
If you are using Sierra Web, the system automatically saves the file to your Download folder.
- Enter a name for the error file.
- Navigate to the location where you want to save the file.
- Click Save. Create Lists saves your file and returns you to the Import Records dialog box.
- If you have valid entries (shown in the bottom half of the Import Records dialog box), continue with the import process above.
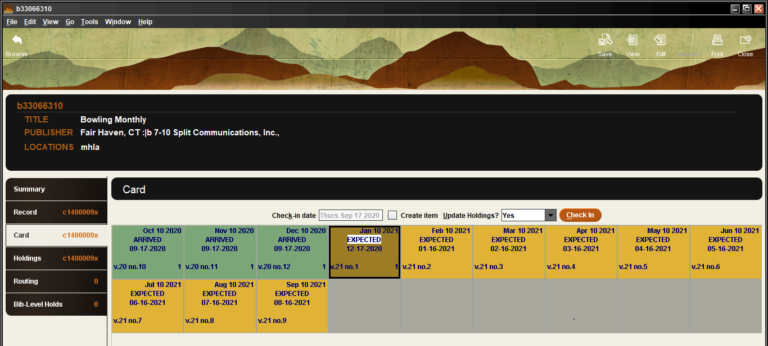
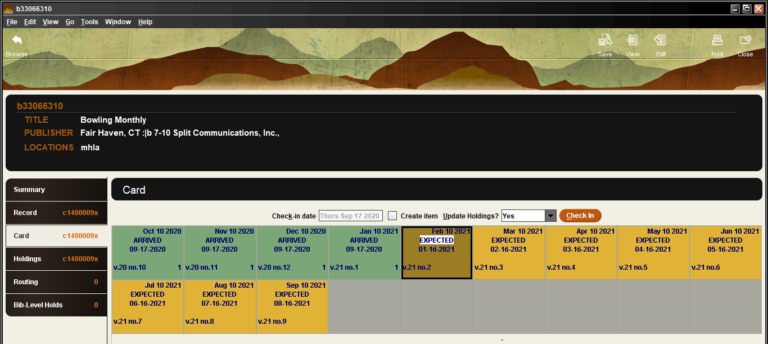
Materials Booking and Your Patrons
In the patron’s account, go to the Bookings tab and click Add Booking.

Locate your bookable item.
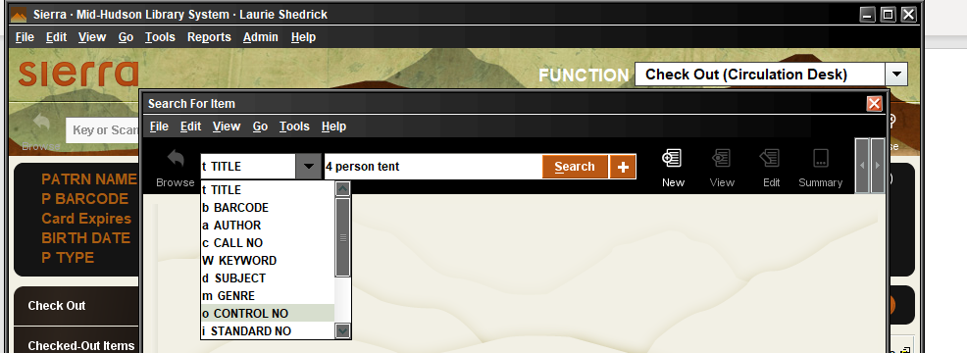
Select the item(s) and choose Book Selected Item(s).
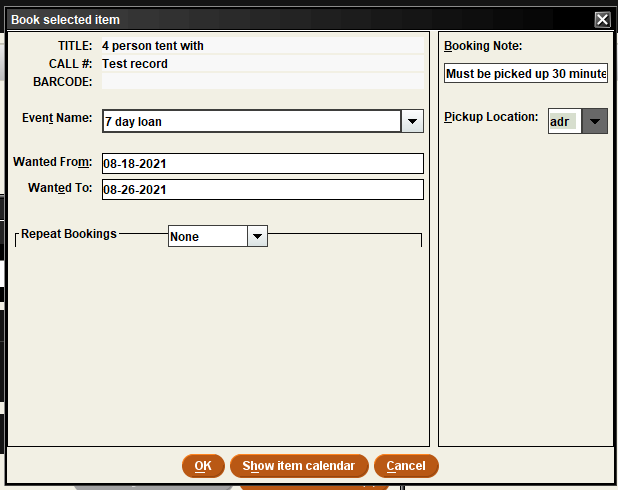
Fill out the booking information (see below).
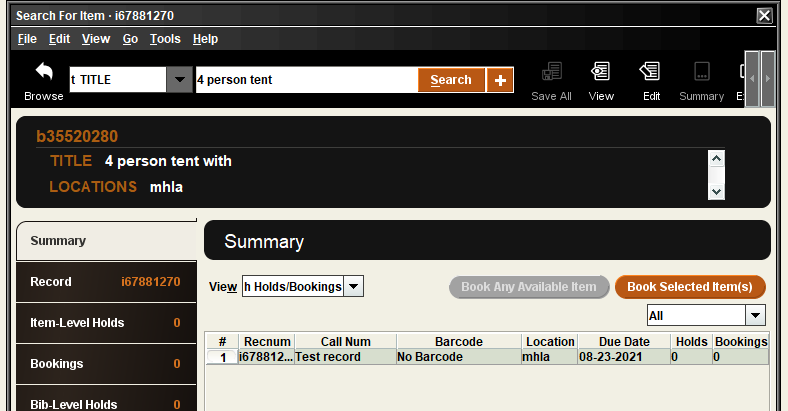
In the Summary tab, make sure the view is Holds/Bookings. Go to the Bookings tab and select Book Selected Item(s).

Search for the patron and continue to filling out the booking information.
Completing the booking information
Event name (optional): If the booking is going to be recurring or involve more than one item, enter an event name. This will help you to manage groupings, locate bookings, and for statistical purposes.
Example: Summer Reading
Dates (wanted from and to): The range that the booking is needed for. The Wanted To date will be defined by default once you pick a start date, but you may edit it.
Repeat Booking (optional): if your booking will repeat, it can be set up in advance.
Booking Note (optional): This is a local note to be used internally or to provide information verbally to the patron.
Pickup Location: Add your library as the pickup location (3 letter code). Right now, booking is limited to your stuff being picked up at your location.
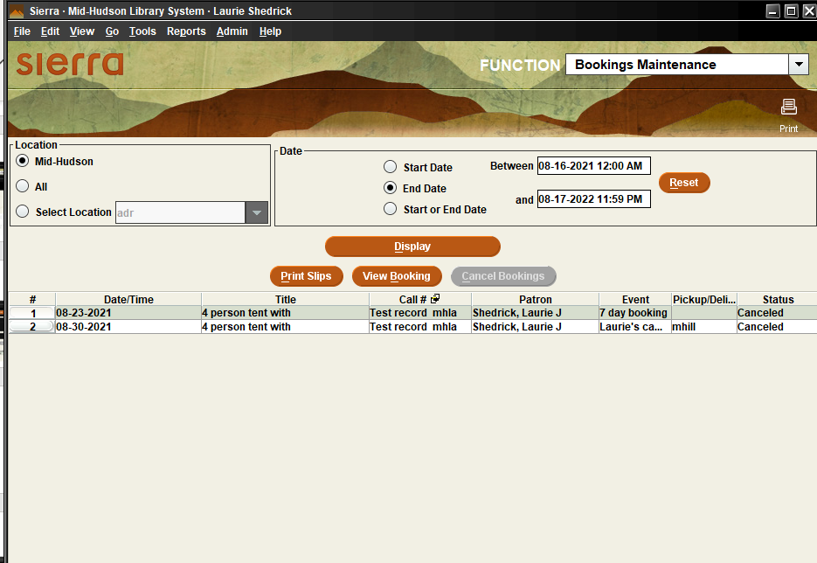
Fulfilling a Booking
Similar to filling holds, you should look to see what you have booked that needs to be readied for pick up. Daily, under Bookings Maintenance, you should run a list of items for that day and the next (or you can edit that range). Print the slips for the selected items. They should be made ready for pickup and placed on the holdshelf or in your specified place.
Cancelled and expired bookings can be removed from the shelf.
Check the item out to the patron like you would any item. The default checkout period defined in the loan rule will be applied, but you may change it.