While the traditional text holdings statements are enough for most libraries, it is also possible to configure the Serials module to let your patrons know exactly which issues you have.
You will do this by setting up the Holdings for your subscription
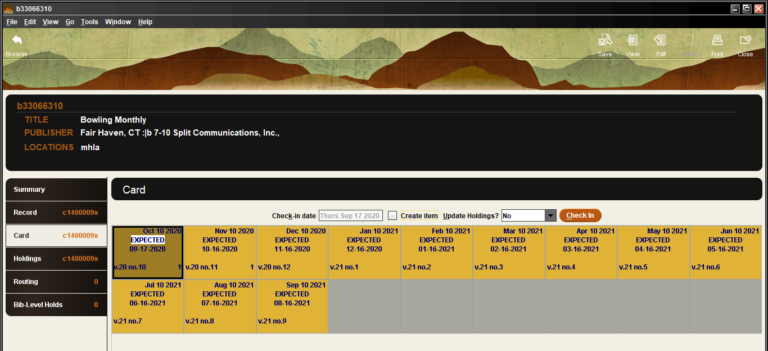
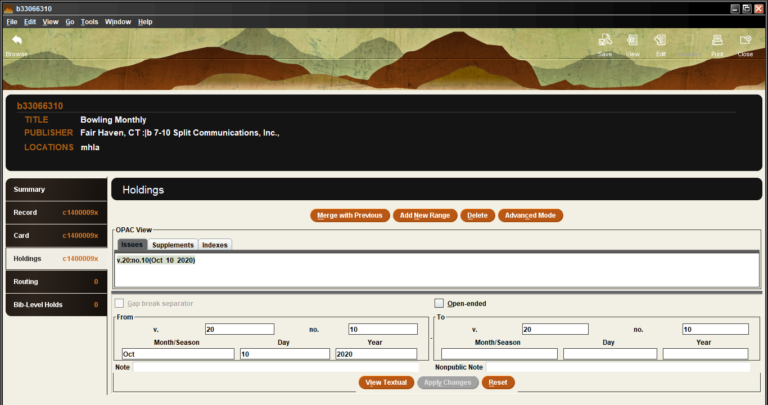
To begin, open the Card for your periodical subscription –
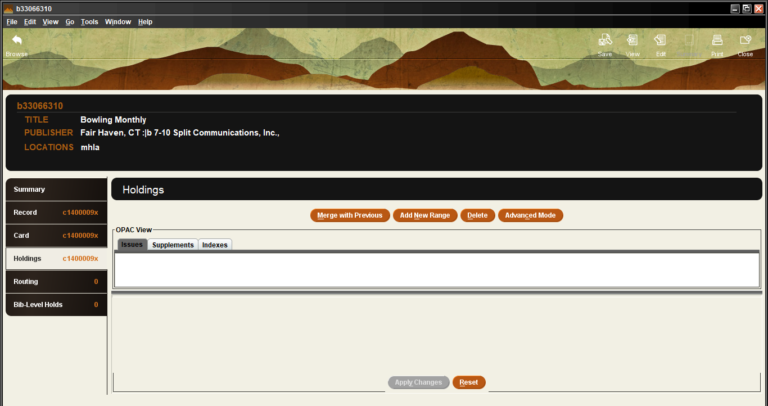
On the left had side of the screen, there are six tabs. Along with the Card tab is one for Holdings –
With no issues currently checked in, there is nothing to display in the Holdings window.
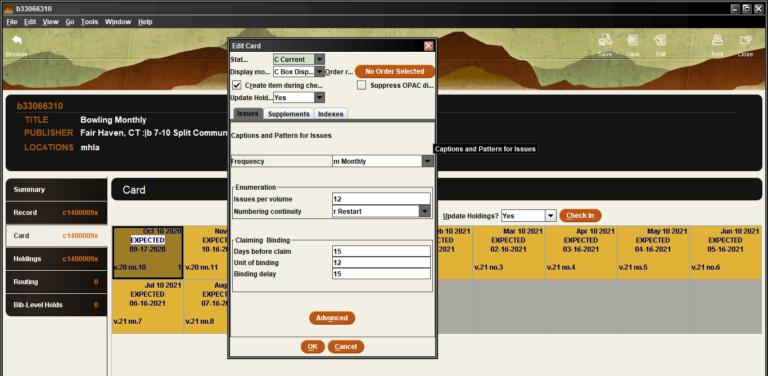
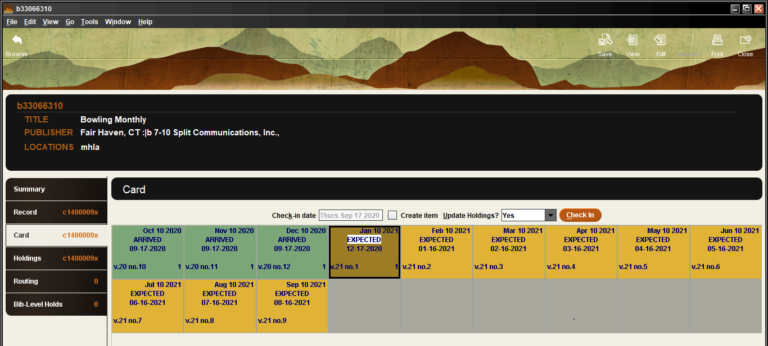
Before checking in the first issue, update the Card so that the check box Update Holdings? is checked. With this box checked, the Update Holdings? box on the Card screen will be checked as well.
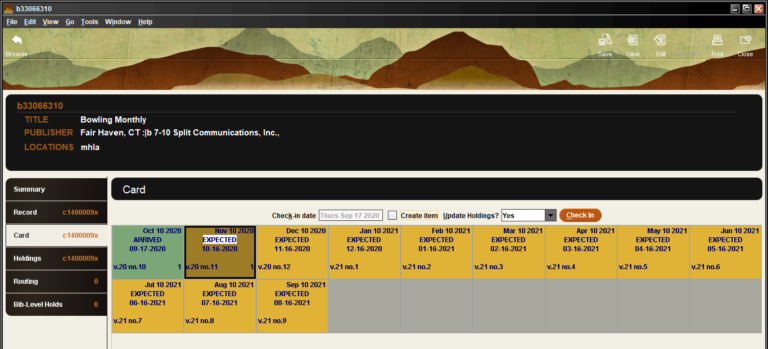
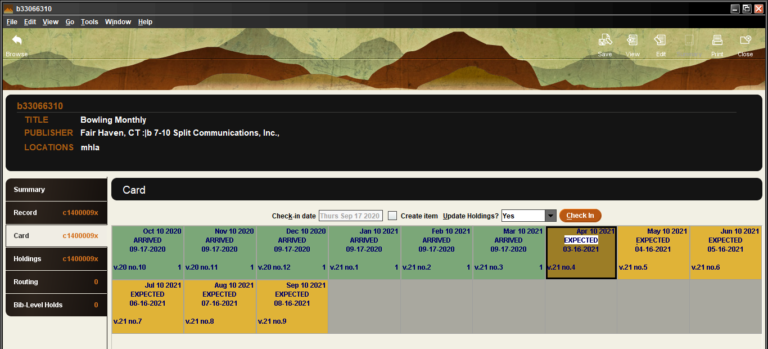
When an issue is Checked In, the Card is updated to reflect that the Issue has Arrived.
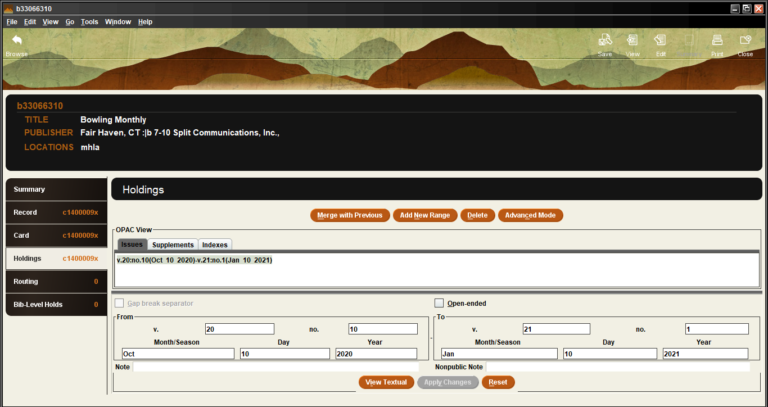
When the Issue is Checked In, as long as the Update Holdings? box is checked,
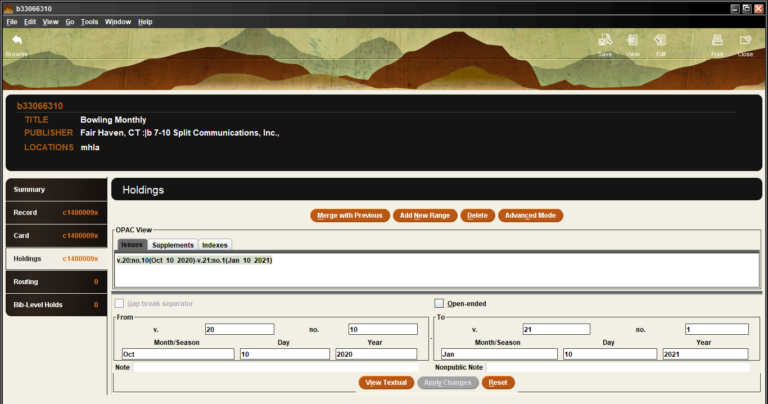
The Holdings tab display will reflect the issues the library owns.
When additional issues are Checked In, Sierra will update the Holdings display automatically.
The Holdings display will even correctly reflect when a Volume of Issues has bee received and a new Volume begins.
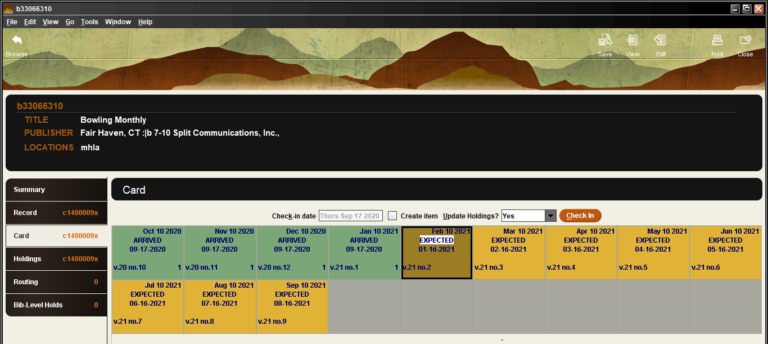
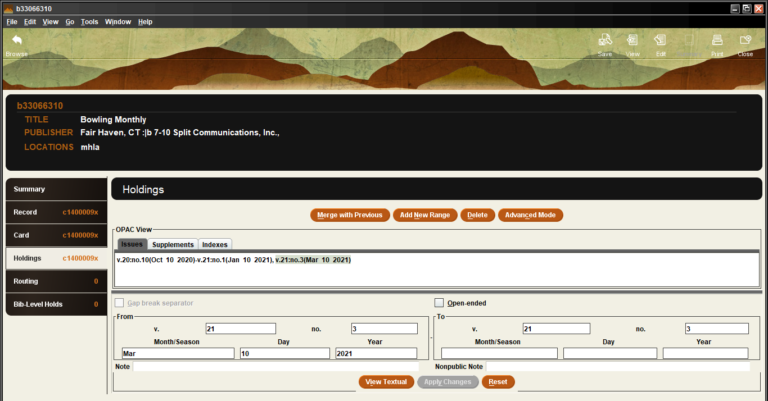
Sometimes an Issue will not have arrived before you receive the following issue – you may Check In Issue 3 before Issue 2 has arrived. When this happens, there is a Gap in your library’s Holdings.
Sierra will recognize this Gap and your Holdings will reflect this Gap accordingly.
But the previously missing Issue may arrive eventually and you will check it in,
When you Check In this issue, there is no longer a Gap in your Holdings and Sierra will update the Holdings display to close the Gap.
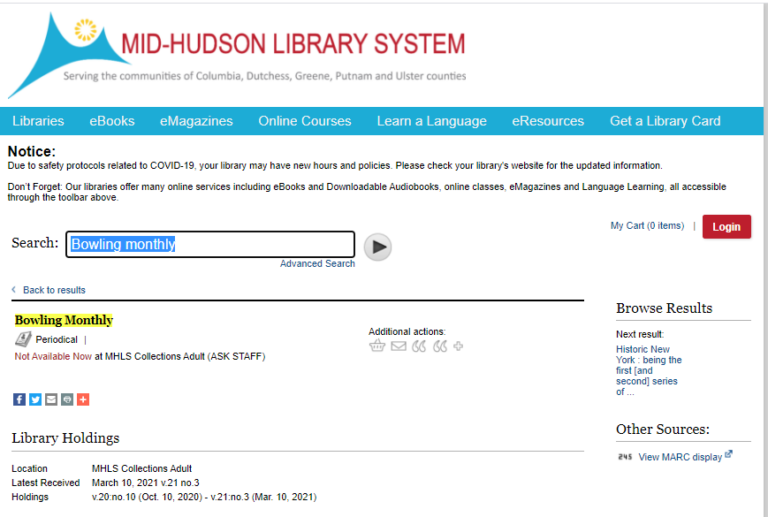
With the Holdings updated for your subscription, your patrons will know exactly which issues your library owns –
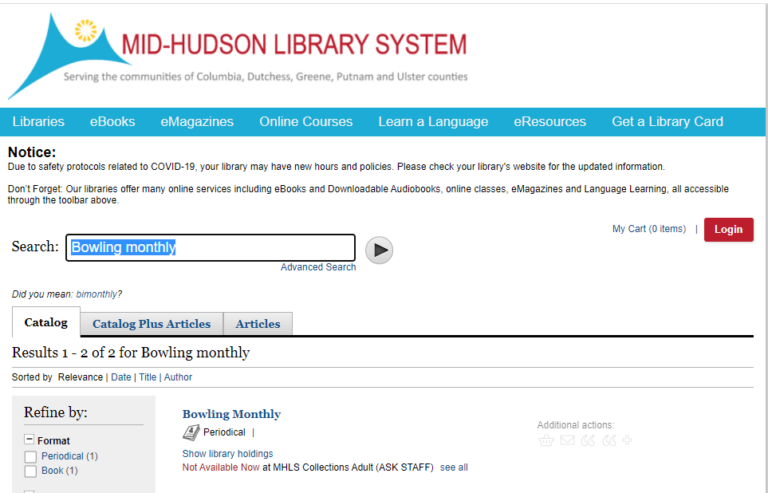
When patrons search for a periodical,
The Holdings for your library will display,
Showing both the latest issue you have received as well as the rangeof all the issues housed in your library.
Description: If your library chooses to use the Internal Patron Images feature, you can capture patron photographs of your patrons and display them in patron records.
Impact: By choosing to enable the Show patron photo option for staff members’ Sierra logins, library staff will be able to view and/or take patron photographs to be stored in patron records. These photographs can provide another level of security for the patron’s account.
If your library chooses to use the Patron Images feature, and you have access to a camera, you can take a patron’s photograph, which will be displayed in the Patron Record. Sierra will display the patron’s photograph in the patron display window.*
The Patron Images feature will be displayed from the Circulation Desk function as well as the Inter-Library Loan function.
*If there is no photograph associated with the Patron’s Record, Sierra will display the photograph area as blank.
Patron Images - this will be launched in Spring 2021
Library Readiness: If your library would like to include this feature, the MHLS support staff will work with you to get both the patron records as well as the photo hardware configured.
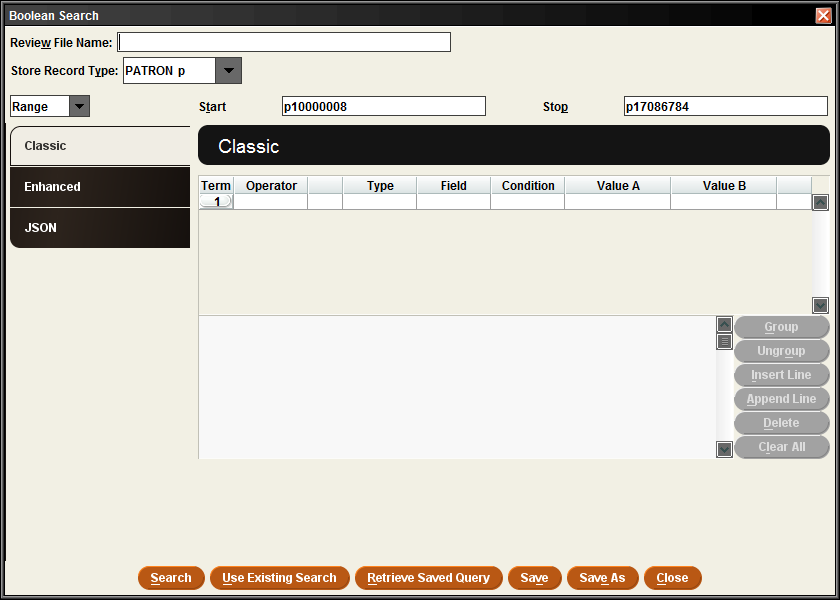
Find and highlight an empty review file and click Search Records.
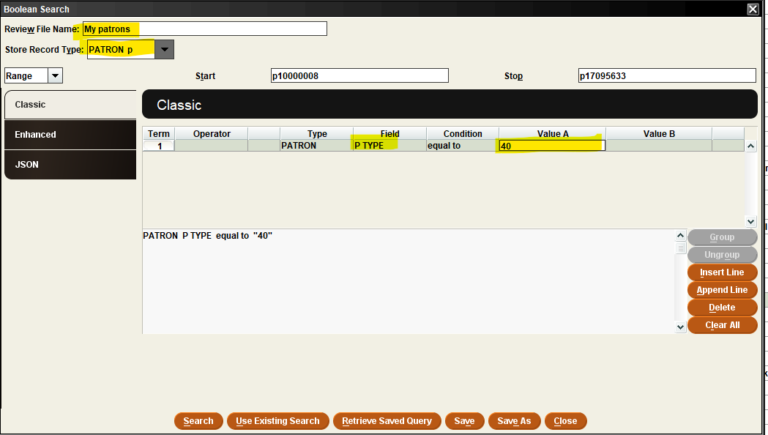
Name the Review File
Range will remain as it is and nothing will be entered in the start and stop fields. This means that your search will be done over the entire patron record set in Sierra, from the first record p10000008 through whatever the last patron created, which is the number populated in the stop field. Note: This is different than when you search for items, because with items you can be certain of the barcode prefix, and change from the entire range of records to search by index of barcode, where you would include the first 5 digits of your barcode in the “start” and “stop”.
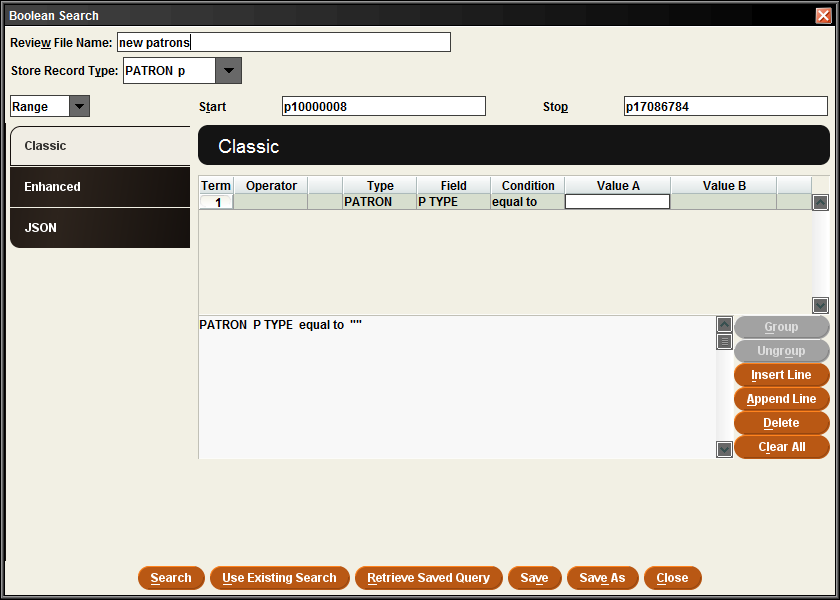
Your search will be:
Type=Patron
Field=PTYPE
Condition = equal to
Value = YOUR Ptype – which will display as the code number in the completed search
Below is an example for the Kingston Library, whose PTYPE is 40.
From Create Lists create a query of patrons added to your library within the last three months.
Find an empty Review File and click on the search Records button. The Query box will open. Set the Record Type to Patron, since those are the types of records you are requesting.
Leave Range set as it is (to search the broadest set of records possible) and start to build your query.
Limit to your patrons by limiting to patrons whose P Type is your library. With your library set, click on Append Line to add another criteria to your query –
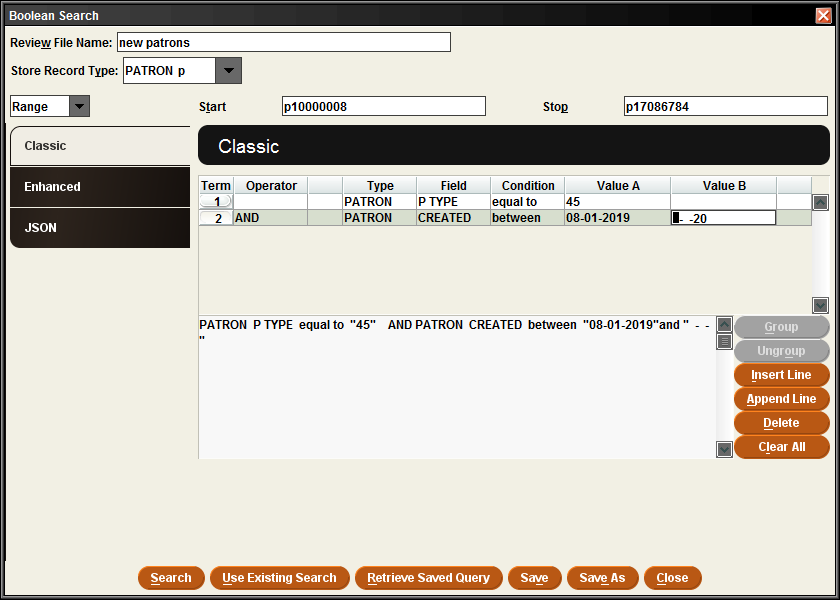
The way to restrict to recently added patron is to limit by patron records created within a certain date range.
Type: Patron
Field: Created
Condition: Between
Value A: Start date
Value B: Current date
You could also set the Condition to Greater than and set Value A to a previous date. This will provide a list of patrons added to your library between that date and when you are running the report.
This is as much query as you will need to gather the information you want. Give the query a Name and click on Search to submit your query.
The report will run and retrieve the records that meet your search criteria. This will give you a total number of new patrons added, to work with those records you will want to Export the records to a spreadsheet.
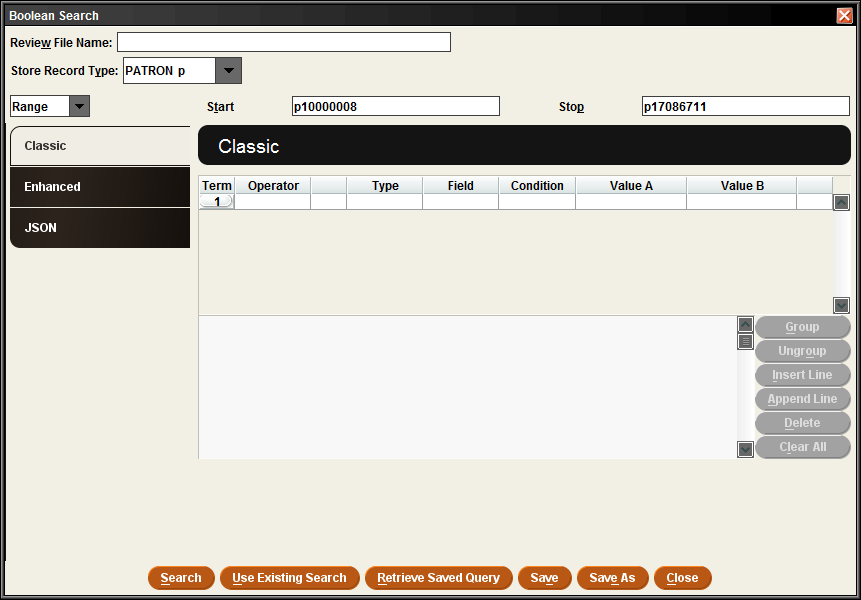
From Create Lists create a query of patrons whose library cards are delinquent, based on a set dollar amount as a threshold.
Find an empty Review File and click on the search Records button. The Query box will open. Set the Record Type to Patron, since those are the types of records you are requesting.
Leave Range set as it is (to search the broadest set of records possible) and start to build your query.
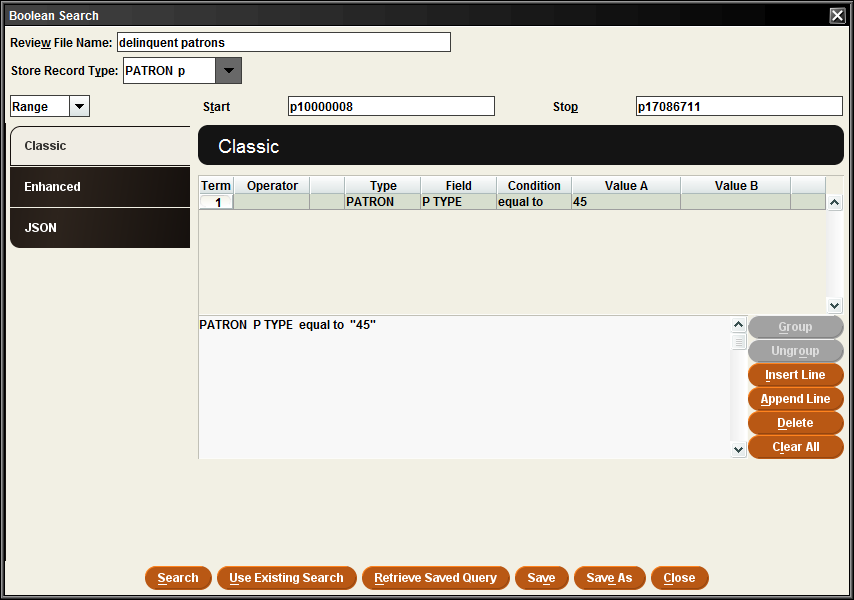
Limit your search to patrons whose home library is your library. With your library set, click on Append Line to add another criteria to your query –
In the second line of your query, input the following criterea:
Type: Patron
Field: Money Owed
Condition: greater than or equal to
Value A: $25
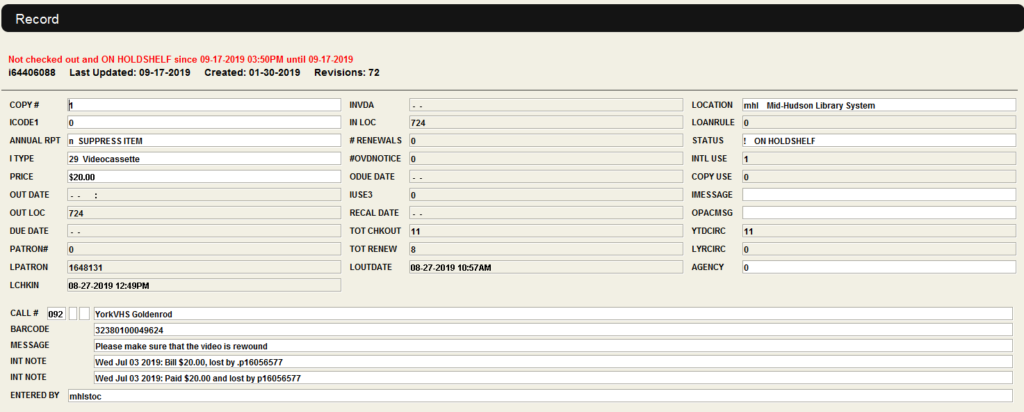
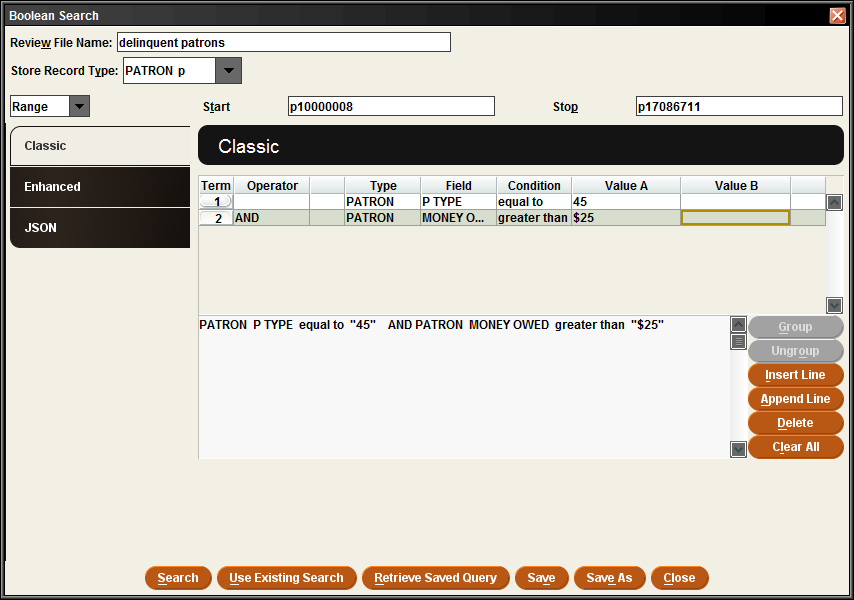
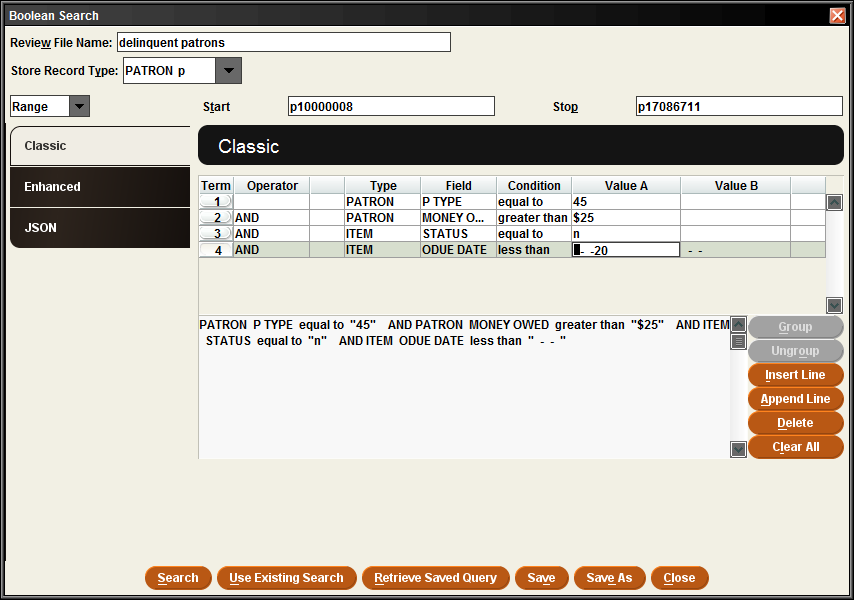
You may want to limit by additional criterea, such as Billed Status or for patrons who were billed more than 30 days ago.
To limit by items that were billed more than 30 days ago:
Type: Item
Field: ODUE DATE
Condition: Less than or equal to
Value A: Today’s date minus 30 days
This query is all you will need to gather the information you want. Give the query a Name and click on Search to submit your query.
The report will run and retrieve the records that meet your search criteria. This will give you a total number of new patrons who owe $25 or more and whose items have been billed. To work with those records you will want to Export the records to a spreadsheet.
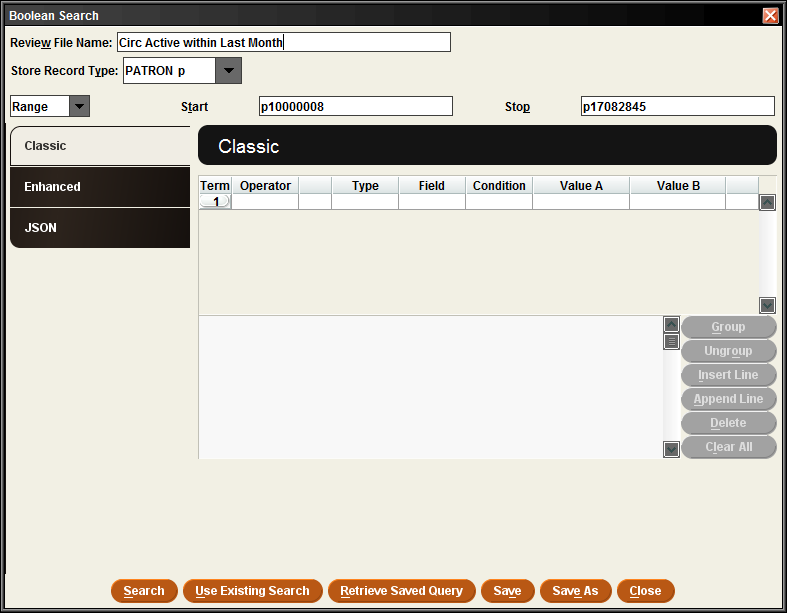
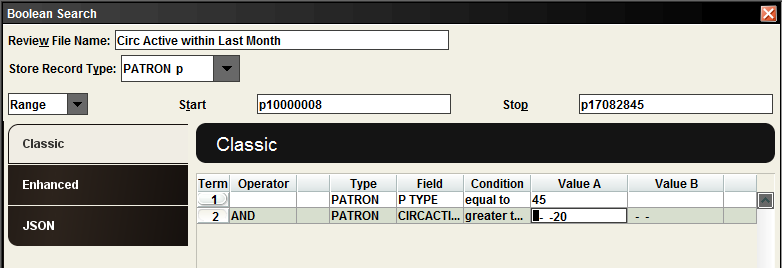
From Create Lists, you can create a report of patrons who have used the library within the last month. You will want to run this report as close to the beginning of the month as possible to retrieve an accurate count.
Find an empty Review File and click on the search Records button. The Query box will open. Set the Record Type to Patron, since those are the types of records you are requesting.
Leave Range set as it is (to search the broadest set of records possible) and start to build your query.
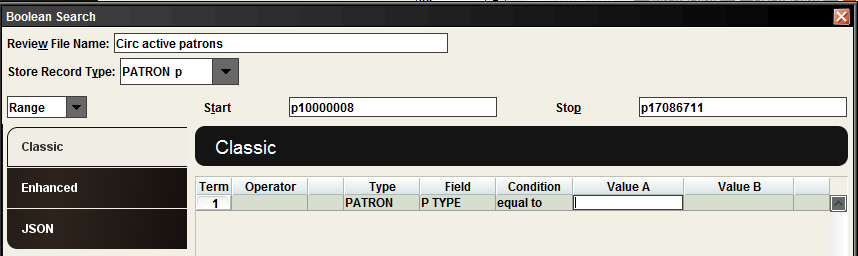
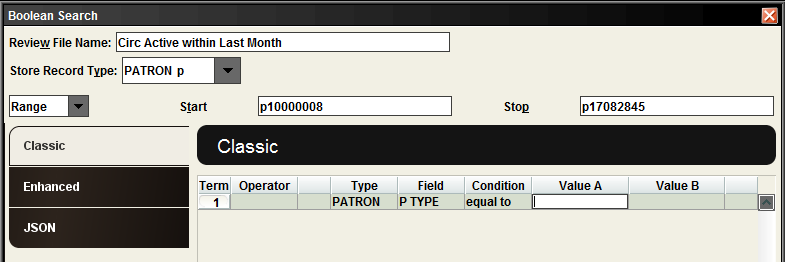
For the first line in your query, establish the patrons to those whose P Type represents your library, meaning your patrons.
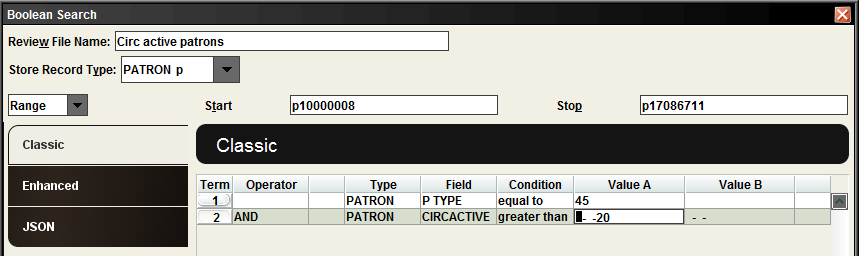
You will only need one other line in your query, to determine that the patrons have used their library card within the last month. To do this use the CIRCACTIVE field
For Condition, use greater than, enter the date of the first day for the previous month. Leave Value B blank.
Search Records.
When the search finishes running, the number in the Current Records field will represent the number of patrons with a circ active date within the last month.
From Create Lists create a query of patrons who have used the library within the last month. You will want to run this report as close to the beginning of the month as possible to retrieve an accurate count.
Find an empty Review File and click on the search Records button. The Query box will open. Set the Record Type to Patron, since those are the types of records you are requesting.
Leave Range set as it is (to search the broadest set of records possible) and start to build your query.
For the first line in your query, establish the patrons to those whose P Type represents your library, meaning your patrons.
You will only need one other line in your query, to determine that the patrons have used their library card within the last month. To do this use the CIRCACTIVE field –
For Condition, use greater than, enter the date of the first day for the previous month. Leave Value B blank.
Search Records.
When the search is completed, the number in the Current Records field will represent the number of patrons with a circ active date within the last month.