In the patron’s account, go to the Bookings tab and click Add Booking.

Locate your bookable item.
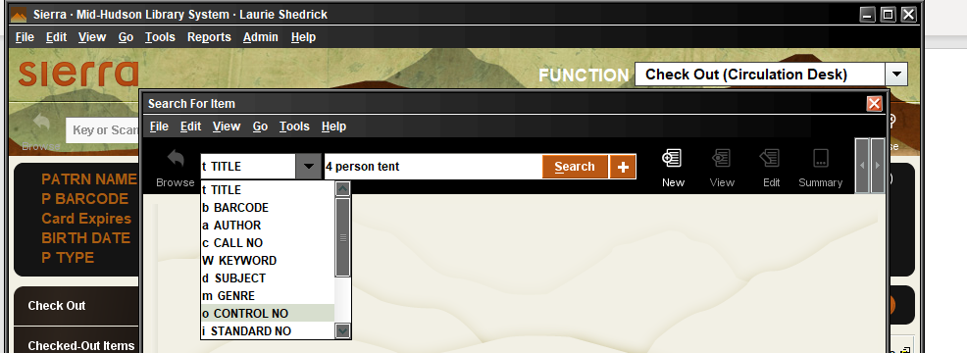
Select the item(s) and choose Book Selected Item(s).
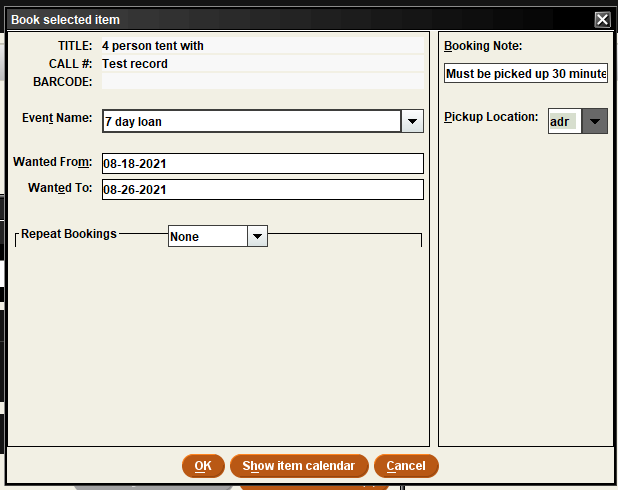
Fill out the booking information (see below).
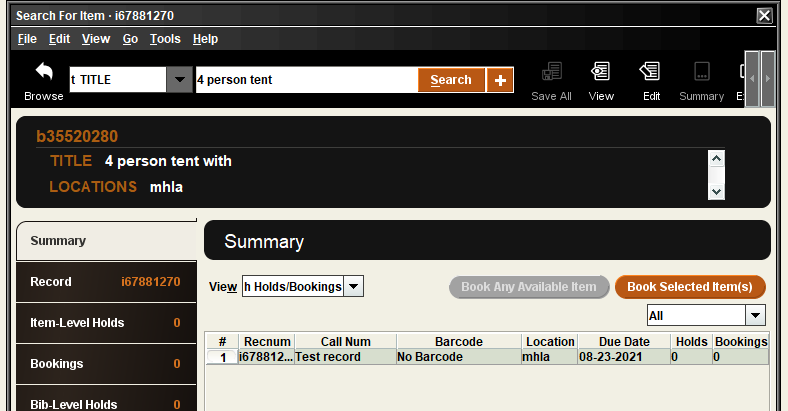
In the Summary tab, make sure the view is Holds/Bookings. Go to the Bookings tab and select Book Selected Item(s).

Search for the patron and continue to filling out the booking information.
Completing the booking information
Event name (optional): If the booking is going to be recurring or involve more than one item, enter an event name. This will help you to manage groupings, locate bookings, and for statistical purposes.
Example: Summer Reading
Dates (wanted from and to): The range that the booking is needed for. The Wanted To date will be defined by default once you pick a start date, but you may edit it.
Repeat Booking (optional): if your booking will repeat, it can be set up in advance.
Booking Note (optional): This is a local note to be used internally or to provide information verbally to the patron.
Pickup Location: Add your library as the pickup location (3 letter code). Right now, booking is limited to your stuff being picked up at your location.
Fulfilling a Booking
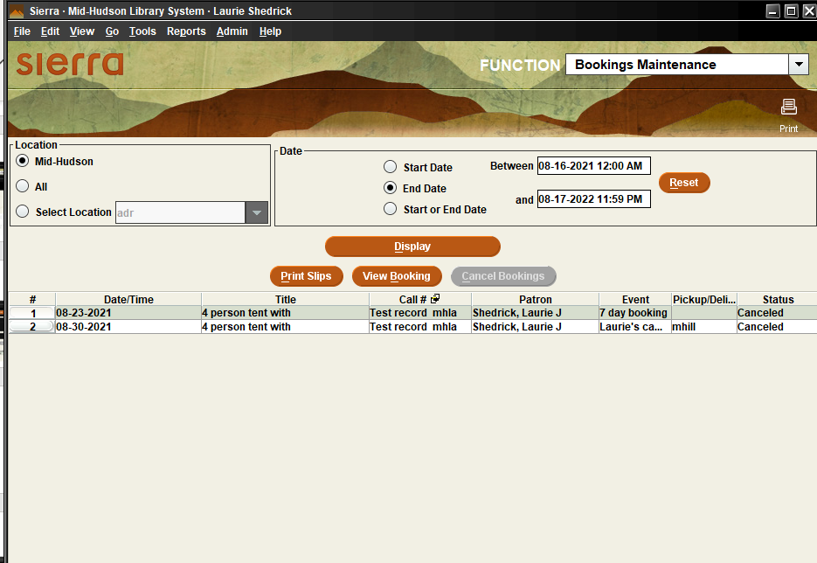
Similar to filling holds, you should look to see what you have booked that needs to be readied for pick up. Daily, under Bookings Maintenance, you should run a list of items for that day and the next (or you can edit that range). Print the slips for the selected items. They should be made ready for pickup and placed on the holdshelf or in your specified place.
Cancelled and expired bookings can be removed from the shelf.
Check the item out to the patron like you would any item. The default checkout period defined in the loan rule will be applied, but you may change it.